1. 用户管理
1.1 创建用户
1.通过配置文件
vim  /etc/clickhouse-server/users.xml

#在<users></users> 区域添加

#用户名root
    <users>
        <root>
            <password>123456</password>
            <networks>
                <ip>::/0</ip>
            </networks>
            <profile>default</profile>
            <quota>default</quota>
        </root>
    </users>
vim /etc/clickhouse-server/users.xml
#在<users></users> 区域添加
#用户名root
<users>
<root>
<password>123456</password>
<networks>
<ip>::/0</ip>
</networks>
<profile>default</profile>
<quota>default</quota>
</root>
</users>1.2 查看用户
select * from system.users; select * from system.users;1.3 删除用户
1.4 修改用户密码
vim /etc/clickhouse-server/users.xmlvim /etc/clickhouse-server/users.xmlusers 配置段的结构
<users>
    <!-- If user name was not specified, 'default' user is used. -->
    <user_name>
        <password></password>
        <!-- Or -->
        <password_sha256_hex></password_sha256_hex>

        <access_management>0|1</access_management>

        <networks incl="networks" replace="replace">
        </networks>

        <profile>profile_name</profile>

        <quota>default</quota>

        <databases>
            <database_name>
                <table_name>
                    <filter>expression</filter>
                <table_name>
            </database_name>
        </databases>
    </user_name>
    <!-- Other users settings -->
</users>
<users>
<!-- If user name was not specified, 'default' user is used. -->
<user_name>
<password></password>
<!-- Or -->
<password_sha256_hex></password_sha256_hex>
<access_management>0|1</access_management>
<networks incl="networks" replace="replace">
</networks>
<profile>profile_name</profile>
<quota>default</quota>
<databases>
<database_name>
<table_name>
<filter>expression</filter>
<table_name>
</database_name>
</databases>
</user_name>
<!-- Other users settings -->
</users>user_name/password
密码可以以明文或SHA256(十六进制格式)或者SHA1指定。
以明文形式分配密码 (不推荐),把它放在一个
password配置段中。例如,
<password>qwerty</password>. 密码可以留空。要使用SHA256加密后的密码,请将其放置在
password_sha256_hex配置段。例如,
<password_sha256_hex>65e84be33532fb784c48129675f9eff3a682b27168c0ea744b2cf58ee02337c5</password_sha256_hex>.从shell生成加密密码的示例:
PASSWORD=$(base64 < /dev/urandom | head -c8); echo "$PASSWORD"; echo -n "$PASSWORD" | sha256sum | tr -d '-' PASSWORD=$(base64 < /dev/urandom | head -c8); echo "$PASSWORD"; echo -n "$PASSWORD" | sha256sum | tr -d '-'结果的第一行是密码。 第二行是相应的SHA256哈希。
为了与MySQL客户端兼容,密码可以设置为双SHA1哈希加密, 请将其放置在
password_double_sha1_hex配置段。例如,
<password_double_sha1_hex>08b4a0f1de6ad37da17359e592c8d74788a83eb0</password_double_sha1_hex>.从shell生成密码的示例:
PASSWORD=$(base64 < /dev/urandom | head -c8); echo "$PASSWORD"; echo -n "$PASSWORD" | sha1sum | tr -d '-' | xxd -r -p | sha1sum | tr -d '-' PASSWORD=$(base64 < /dev/urandom | head -c8); echo "$PASSWORD"; echo -n "$PASSWORD" | sha1sum | tr -d '-' | xxd -r -p | sha1sum | tr -d '-'❌ 注意
修改users.xml文件不需要重启,修改后会直接生效;
如果是集群则每台机器都需要更新users.xml配置文件。
2.权限的类型
https://clickhouse.com/docs/zh/operations/system-tables/users
3. 控制访问控制
2.0开启远程访问
vim /etc/clickhouse-server/config.xml

<listen_host>::</listen_host>
或者
<listen_host>0.0.0.0</listen_host>
vim /etc/clickhouse-server/config.xml
<listen_host>::</listen_host>
或者
<listen_host>0.0.0.0</listen_host>默认是127.0.0.1启动
重启服务,systemctl restart clickhouse-server.service
2.1开启任意访问
<ip>::/0</ip><ip>::/0</ip>2.2 限定本机访问
<ip>::1</ip>
<ip>127.0.0.1</ip>

#如果是多个ip,请每行添加一个<ip>::1</ip>
<ip>127.0.0.1</ip>
#如果是多个ip,请每行添加一个4.访问
4.1 通过click-client
[root@kubeadm-master01 clickhouse]# clickhouse-client
ClickHouse client version 23.12.6.19 (official build).
Connecting to localhost:9000 as user default.
Password for user (default):
Connecting to localhost:9000 as user default.
Connected to ClickHouse server version 23.12.6.

Warnings:
 * Linux transparent hugepages are set to "always". Check /sys/kernel/mm/transparent_hugepage/enabled
 * Delay accounting is not enabled, OSIOWaitMicroseconds will not be gathered. Check /proc/sys/kernel/task_delayacct
 * Maximum number of threads is lower than 30000. There could be problems with handling a lot of simultaneous queries.

kubeadm-master01 :) show databases;

SHOW DATABASES

Query id: b1133daf-1d68-4f7f-8353-f3b2acd20b02

┌─name───────────────┐
│ INFORMATION_SCHEMA │
│ default            │
│ information_schema │
│ system             │
└────────────────────┘
[root@kubeadm-master01 clickhouse]# clickhouse-client
ClickHouse client version 23.12.6.19 (official build).
Connecting to localhost:9000 as user default.
Password for user (default):
Connecting to localhost:9000 as user default.
Connected to ClickHouse server version 23.12.6.
Warnings:
* Linux transparent hugepages are set to "always". Check /sys/kernel/mm/transparent_hugepage/enabled
* Delay accounting is not enabled, OSIOWaitMicroseconds will not be gathered. Check /proc/sys/kernel/task_delayacct
* Maximum number of threads is lower than 30000. There could be problems with handling a lot of simultaneous queries.
kubeadm-master01 :) show databases;
SHOW DATABASES
Query id: b1133daf-1d68-4f7f-8353-f3b2acd20b02
┌─name───────────────┐
│ INFORMATION_SCHEMA │
│ default │
│ information_schema │
│ system │
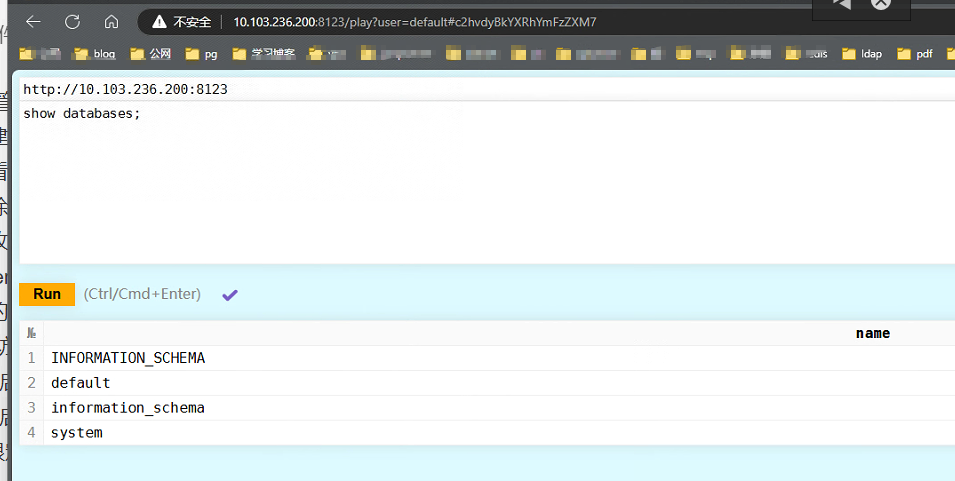
└────────────────────┘4.2 通过http
浏览器输入ip:8123/play

参考地址:
https://clickhouse.com/docs/zh/operations/settings/settings-users