export JAVA_OPTS=-Djava.awt.headless=true -Xmx512m -DJENKINS_HOME=/www/data/jenkins export MAVEN_OPTS="-Xmx512m -XX:MaxPermSize=256m" export ANT_OPTS="-Xmx512mm -XX:MaxPermSize=256m"
nginx 代理jenkins
通过使用basic_auth搜索用作任何其他应用程序的反向代理的Nginx,找到了我的问题的解决方案.
解决方案是这里找到的答案:https://serverfault.com/questions/511846/basic-auth-for-a-tomcat-app-jira-with-nginx-as-reverse-proxy
我的nginx配置中缺少的行是:

 # Don't forward auth to Tomcat
 proxy_set_header   Authorization "";

 默认情况下,看起来在基本身份验证之后Nginx会另外将身份验证标头转发给Jenkins,这就是导致我的问题. Jenkins收到转发的auth标头,然后认为它也需要自己授权?!
 如果我们将反向代理设置为不转发任何授权标头,如上所示,则一切正常. Nginx将提示basic_auth,并且在成功验证后,我们在转发到我们的反向代理时明确清除(重置?)auth标头.

 #完整配置
 upstream jenkinsUP {
	server 172.16.195.194:9191 max_fails=5 fail_timeout=30s;
}

server {
	listen 80;
    server_name xxx.com;


include /data/apps/nginx/conf/roles/*.conf;

#if ($geoip2_data_subdivisions_name != Beijing){
#    return 444;
#}
if ($geoip2_data_country_name != China){
    return 444;
}
 if ($geoip2_data_country_code != CN) {
    return 444;
 }

	location / {
	proxy_set_header   Authorization "";
	proxy_set_header Host $host;
        proxy_set_header x-for $remote_addr;
        proxy_set_header x-server $host;
        proxy_set_header x-agent $http_user_agent;
        proxy_pass     http://jenkinsUP/;
	#allow 106.39.149.43;
	#deny all;
    }
	access_log  /var/log/nginx/access.log es;
}
通过使用basic_auth搜索用作任何其他应用程序的反向代理的Nginx,找到了我的问题的解决方案.
解决方案是这里找到的答案:https://serverfault.com/questions/511846/basic-auth-for-a-tomcat-app-jira-with-nginx-as-reverse-proxy
我的nginx配置中缺少的行是:
# Don't forward auth to Tomcat
proxy_set_header Authorization "";
默认情况下,看起来在基本身份验证之后Nginx会另外将身份验证标头转发给Jenkins,这就是导致我的问题. Jenkins收到转发的auth标头,然后认为它也需要自己授权?!
如果我们将反向代理设置为不转发任何授权标头,如上所示,则一切正常. Nginx将提示basic_auth,并且在成功验证后,我们在转发到我们的反向代理时明确清除(重置?)auth标头.
#完整配置
upstream jenkinsUP {
server 172.16.195.194:9191 max_fails=5 fail_timeout=30s;
}
server {
listen 80;
server_name xxx.com;
include /data/apps/nginx/conf/roles/*.conf;
#if ($geoip2_data_subdivisions_name != Beijing){
# return 444;
#}
if ($geoip2_data_country_name != China){
return 444;
}
if ($geoip2_data_country_code != CN) {
return 444;
}
location / {
proxy_set_header Authorization "";
proxy_set_header Host $host;
proxy_set_header x-for $remote_addr;
proxy_set_header x-server $host;
proxy_set_header x-agent $http_user_agent;
proxy_pass http://jenkinsUP/;
#allow 106.39.149.43;
#deny all;
}
access_log /var/log/nginx/access.log es;
}jenkins 管理员密码重置
修改admin的加密密码为123456的加密密码
#jbcrypt:$2a$10$MiIVR0rr/UhQBqT.bBq0QehTiQVqgNpUGyWW2nJObaVAM/2xSQdSq

vim /path/jenkins/users/admin/config.xml
<hudson.security.HudsonPrivateSecurityRealm_-Details>
  <passwordHash>#jbcrypt:$2a$10$MiIVR0rr/UhQBqT.bBq0QehTiQVqgNpUGyWW2nJObaVAM/2xSQdSq</passwordHash>
</hudson.security.HudsonPrivateSecurityRealm_-Details>
修改admin的加密密码为123456的加密密码
#jbcrypt:$2a$10$MiIVR0rr/UhQBqT.bBq0QehTiQVqgNpUGyWW2nJObaVAM/2xSQdSq
vim /path/jenkins/users/admin/config.xml
<hudson.security.HudsonPrivateSecurityRealm_-Details>
<passwordHash>#jbcrypt:$2a$10$MiIVR0rr/UhQBqT.bBq0QehTiQVqgNpUGyWW2nJObaVAM/2xSQdSq</passwordHash>
</hudson.security.HudsonPrivateSecurityRealm_-Details>官方文档:
https://www.jenkins.io/zh/doc/book/using/using-credentials/
https://www.jenkins.io/zh/node/
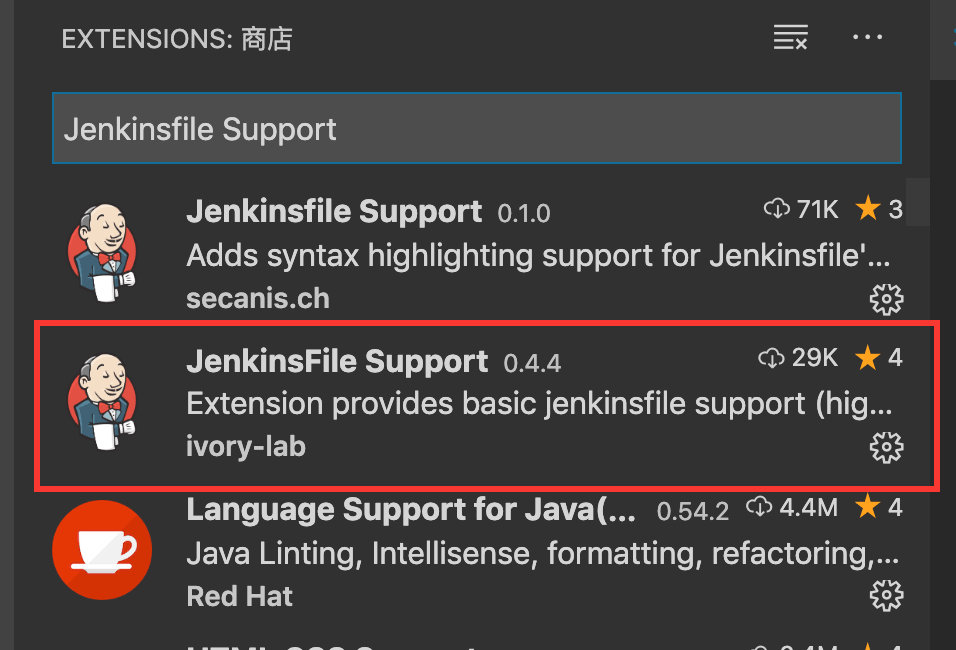
高亮、代码提示
打开插件市场,并搜索Jenkinsfile Support

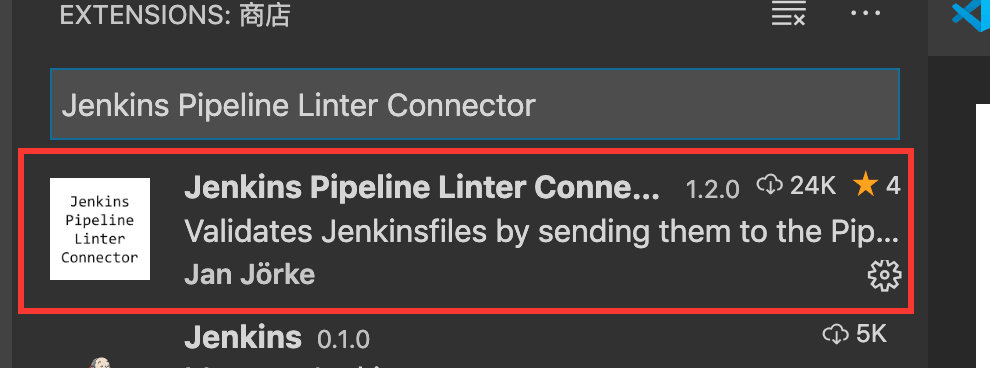
规则校验
打开插件市场,并搜索Jenkins Pipeline Linter Connector

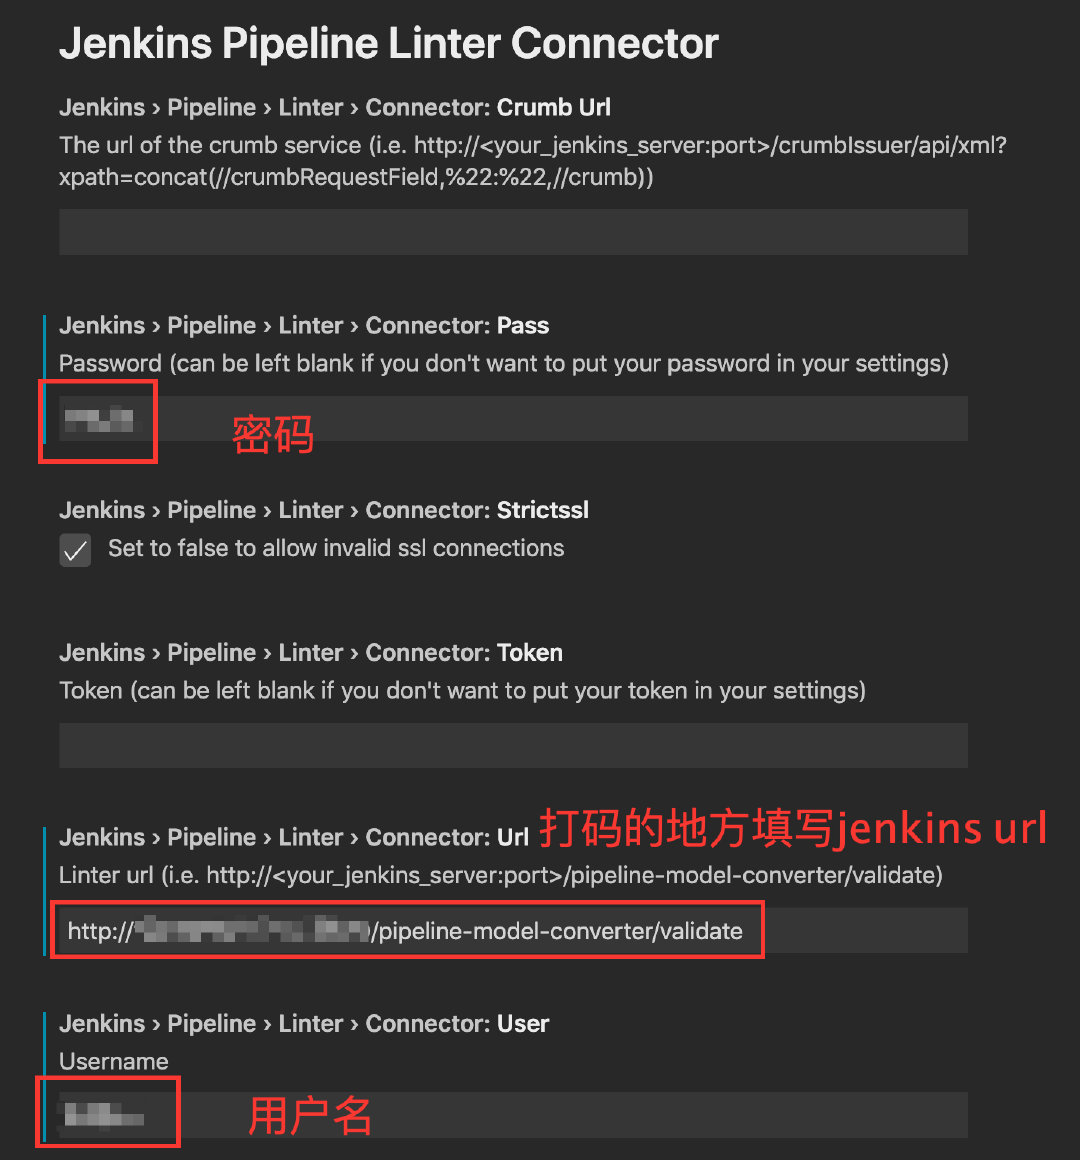
扩展` > `Jenkins Pipeline Linter Connector扩展` > `Jenkins Pipeline Linter Connector配置插件

http://<your_jenkins_server:port>/pipeline-model-converter/validatehttp://<your_jenkins_server:port>/pipeline-model-converter/validate校验
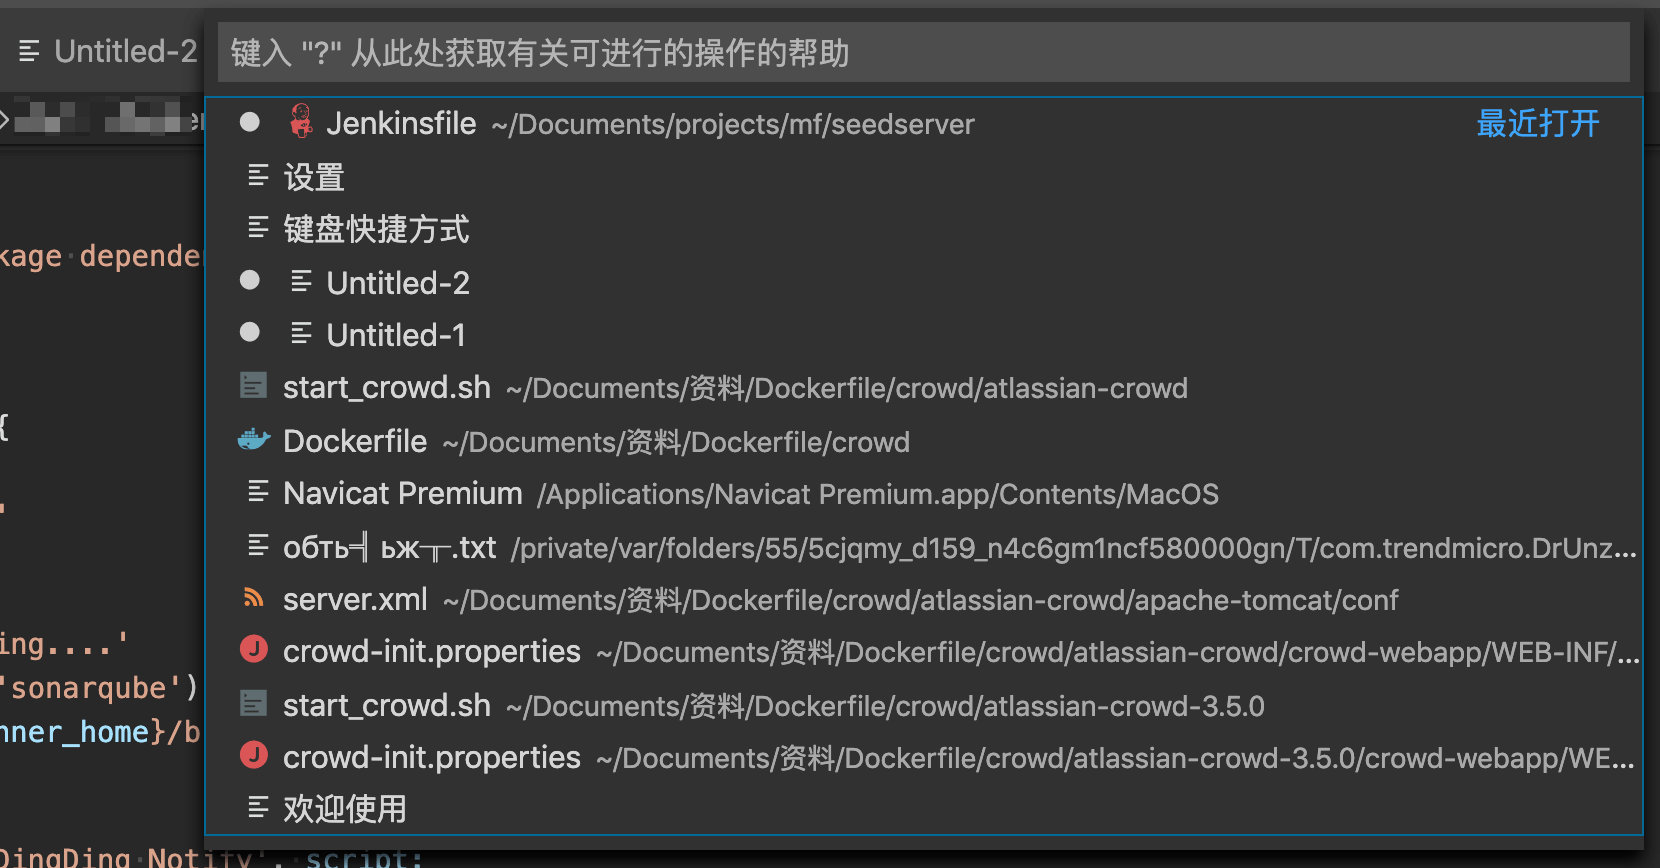
在打开的Jenkinsfile文件中,按下快捷键shift+command+P(windows下是shift+ctrl+P)

输入validate Jenkinsfile并按回车(记住快捷键,下次就可以快捷键操作了)
批量删除历史记录
项目管理 ----》 脚本命令行 ---》放入下面的脚本
def jobName = "ugou-admin-online"   //删除的项目名称
def maxNumber = 600    // 保留的最小编号,意味着小于该编号的构建都将被删除

Jenkins.instance.getItemByFullName(jobName).builds.findAll {
  it.number <= maxNumber
}.each {
  it.delete()
}
def jobName = "ugou-admin-online" //删除的项目名称
def maxNumber = 600 // 保留的最小编号,意味着小于该编号的构建都将被删除
Jenkins.instance.getItemByFullName(jobName).builds.findAll {
it.number <= maxNumber
}.each {
it.delete()
}